Links

Showing posts with label Painting. Show all posts

25 April 2016

BG-82 Campaign Log / Painting Chart

Painting Chart middle 2015
Above was my Painting chart around the middle of  2015...  As you can see it's changed a bit when compared with the chart below. 

I've adjusted my painting chart too reflect the fluff behind my army, and to show where it is that I would like to go.  As you can see I need a lot more Infantry... i've got most of the heavy weapons I need I just need to assemble and paint them.  And with the addition of a new Super Heavy I think it's safe to say that my armor is complete although a few need to be repainted.  :)  Now I just have to get some of these projects prioritized so that I get them done.

11 April 2016

NSFW - Objective Marker

I have thought a long time about how best to distract the enemy on the battlefield, and at the same time provide inspiration for my own forces.  I believe that I may have now found something that will not only distract the enemy, but also inspire my army! This shall be one of my new Objective Markers.
I guess I have a few models like this laying around, but this is prolly the one that "shows" the most.  To be honest, this was also one of the few models that I have ever hated and I do mean Hated painting.
You see I have a rough time painting skin.  And although my version seems to work ok on IG, and such, I have never tried painting so much skin in my life.  In fact what you see here is prolly the 3rd or 4th version!!!!  I kept trying and my wife kept telling me that she look like 2 year old who just found the make-up drawer.


08 July 2015

Macharius Vanquisher - WIP - Part 2

So after the shading from last time, I added the second layer, and finished up my Tank Commander.  No closeups of her as I'm planing an individual post for that. 


After that I covered the model in "UHU Patafix" adhesive pads, you don't have to push it down into the corners but make sure that you've covered all the areas that you want to keep the original Beige color. I supposed you could use silly putty or something along those lines as well.  It took a bit to get it all covered but it was well worth the few extra minutes.  After that I sprayed her with an "olive brown", and let her dry.

So, once the first two brown's are dry, add another layer of adhesive pads on all the parts that you want to keep with the darker brown, but don't remove the first!  As you can see I then sprayed again using Olive Drab.  Now it's time to kick back, let'er dry and enjoy a cold one.

And now we have the finished (almost) product.  I had to go back and tidy up a few spots where I sprayed to heavily and there we a few places where I jammed the putty to hard into the cracks.  But all in all I think I'm allowed to pat myself on the back. 


21 May 2015

7th Scansin Heavy Weapons

Here's the first finished heavy weapons teams for the 7th Scansin.  The weapons are just clipped in so that I can swap them out for Las-Cannons if need be.  In total I plan on doing up 2 more Teams, but those will be static Mortar teams and won't be able to swap the weapons.

These will be my counts as Heavy Bolters

The models themselves I purchased through a Kickstarter from Curious Constructs. They are now available for direct purchase from the web store as well, as I have picked up a few extra pieces for the ones that I have. As I mentioned in some earlier posts, the models were great, easy to prep, and a joy to paint.  
And of course these are Auto Cannons.
 Once I get a bit of time in between getting the Macharius done, I'll start work on the other weapons for these, along with the Mortar Teams.

* and I'll see ya in a week or so, I'm outta here for a week.

01 May 2015

E Tenebrae Lux IV - Macharius Vanquisher

Well as some of you may remember I won a Macharius Vanquisher a while back.  Original post here Up until now I just haven't been able to find the time to get her done, but over the next 3 months I should have more than enough free time do finally do it.

Here's the current progress as of today.
 

The big push though came from the painting competition over at Bolter and Chainsword.  So I've pledged my Mach and now I have to finish it.

08 February 2015

7th Scansin - Heavy Weapons


Well I've had these for a while now and just finally got around to start painting them up.  They're the Heavy Weapons from the first Kickstarter ran by Col. Gravis.  Unfortunately I didn't really take any pictures up until this point, but I'll see about making sure that I take pics as I do up the rest.
 
Right now I'm only going to paint what is going to count as the Heavy Bolter and the Assault Cannon.  The Lascannon is going to end up on a different base.  As for mortars those will be done up on stand alone bases, and the rest of the heavy weapons are going to be done so that I can swap them out on the carriages.

I also didn't as get as much done as I wanted because my daughter wanted to play Princess Castle with her Lego's so of course I had to get involved.  This was the result.

16 June 2013

7th Scansin (1st Section)

Progress has been made! I've got the base colors down, and even knocked out the first layer of shading.  Skin tones are in and even the start of a few beards.  I really love the detail in the heads, the one's from Victoria Miniatures fit the best (the bodies are from there as well)  but those from Max Mini, (once trimmed) fit in just fine.


 Since the last picture was taken I've done a bit of detailing, and the 2nd layer of shading.  More pics to follow at some point... 

Oh, and as a parting gift here's a quick shot of what's going to be my 6 man squad of Sharpshooters (counts as squats).

10 June 2013

Open projects

Here's just a few of my open projects, that I would like to see done before the end of the year.  I probably have a few more but this is more than enough to keep me busy (and some of these are already a year in the making...).  First up is my GK terminators.  I've had these guys since, well... to be honest I'm not even sure anymore.  Three of the 5 are 90% done, the other 2 need a bit more work.

Ah yes, the armor of the 73rd Fantoma Armored Regt.  Above is the new color scheme.  I only have 12 more tanks to re-paint like that and I'll be done.  Even with the airbrush that's gonna take a while.  


The Imperial Navy Fleet assets of Vallivar Sub-sector.


Vengeance Class Grand Cruiser "Bringer of Truth" (90%)
Dictator Class Cruiser "Death Dealer " (done)
Gothic Class Cruiser "Integrity" (done)
Dauntless Class Light Cruiser "Redemptor" (0%)
Dauntless Class Light Cruiser "Relentless" (0%)
Falchion Class Escort "Fury Squadron" (0%)
Cobra Class Escort "Wraith Squadron" (0%)


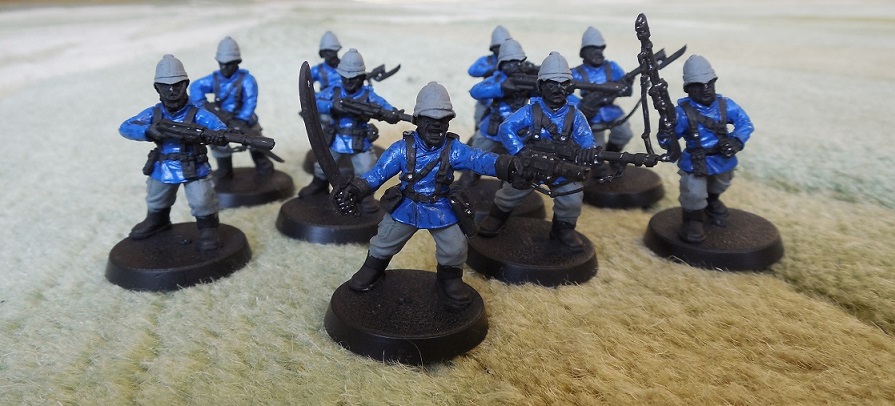
 I"m slowly making headway on these guys to.  I've decided to change a lot of the detailing, and started on the first squad.  There will be a separate dedicated post to these guys in the next few days. 


Almost the same as above.  The last two are the projects that are sitting on my desk.  The others on the shelve right above my desk, and the projects that are on other shelves or boxes are not even listed.  Like above, I'll do a separate dedicated post to these guys in the next few days.  


05 September 2012

Exterminator Weathering Repaint

As mentioned in my previous post I decided to try out the so called "Salt technique" to weathering.  Now in almost every How-To I could find your supposed to wash off the Salt with water.  Seeing that my Exterminator is made from Cereal box that wasn't exactly an option.  Instead I had to deal with brushing the salt off with a stiff brush and gently with a plastic sculpting  knife.  Here's a close up of the end result.

Now as you can see it wasn't the best of clean up jobs, but it got the job done.  I have sense gone back and touched up the couple of white spots but others I've left.  I figure once I go back and use weathering powders many of those spots and blemishes will blend away.

Overall, for the first try I don't think it turned out that bad.  I learned a bit in the process and will need to remember to not use so much Hairspray next time, as well as spraying a lighter coat of brown.  In the picture above the line from where the tape was is quite visible.  :)

More to follow... as time allows...

12 August 2012

Adventures in using an Air Brush.

Well I had some time today to get out the Air brush and I started adding on the next color.  I have to admit taping off the new Camo design took more time than actually painting the model.  I'm pleased with the results, but learned a bit while I was at it. 

Some of you have noticed a few runs and smudges were I applied to much paint and where I didn't get get the tape pressed tight enough on the model...  It's important to take your time when taping everything off because the tape really does need to sealed good.  If not the paint will get underneath and you'll have to touche it up later. 

Next up removing the salt and starting on the a few more minor details before moving onto the weathering.


08 July 2012

New Air Brush

So I picked up a new airbrush a couple weeks ago and finally had the chance to try it out the other day.  I'll admit it's a beginner's class starter kit from Revell.  But I am just a beginner with one of these so I don't mind at all.  Besides it's there to help m repaint all my armour, and as you can see in the two pics below it works wonders.  It's super easy to use, and feels quite comfortable in the hand.  The trigger on top is easy to push so you don't have to squeeze hard at all.

 The clip in the front is for the paint jar so and feels quite balanced in the hand.  He only issue I had was that I originally didn't have  enough paint in the jar (I was only testing it) an I found that rotated the gun to achieve different angles I would loose the paint... 

So anyways heres the progress of tank one after 20 minutes time painting and a bit of drying time between 3 layers.  

Yes I said 3 layers.  Black, Dark Green, hairspray with salt, and the 3rd layer of lighter green. And all that with a painting time of 20 minutes!!!   Love this thing!!!

Here's my only worry..  how long does one of these cans last? 

 More news and pics as I get further along.